使用CMS管理Hexo文章
闲来无事折腾了一下Hexo,纯属偶然发现有一个叫netlify的网站可以提供静态网站的托管服务,能提供CMS服务,让静态网站也能享受类似WordPress的在线编辑!简直太棒了!
在Hexo上添加netlify-cms相关内容 #
添加依赖包 #
npm i hexo-netlify-cms --save
修改Hexo主配置文件 #
在_config.yml里面添加
netlify_cms:
  config_file: netlify.yaml
创建netlify配置文件 #
在hexo根目录创建netlify.yaml文件,输入以下内容
backend:
  name: git-gateway
  branch: master

media_folder: source/images
public_folder: /images
publish_mode: editorial_workflow

# pages auto generate
pages:
  enabled: true
  # over page collection config
  # if fields not set, would use posts fields config
  config:
    label: "Page"
    delete: false
    editor:
      preview: true
    # fields:
# through hexo config over fields
over_format: true
scripts:
  - js/cms/youtube.js
  - js/cms/img.js

# A list of collections the CMS should be able to edit
collections:
  # Used in routes, ie.: /admin/collections/:slug/edit
  - name: "posts"
    # Used in the UI, ie.: "New Post"
    label: "Post"
    folder: "source/_posts" # The path to the folder where the documents are stored
    sort: "date:desc"
    create: true # Allow users to create new documents in this collection
    editor:
      preview: true
    fields: # The fields each document in this collection have
      - {label: "Title", name: "title", widget: "string"}
      - {label: "Publish Date", name: "date", widget: "datetime", format: "YYYY-MM-DD HH:mm:ss", dateFormat: "YYYY-MM-DD", timeFormat: "HH:mm:ss", required: false}
      - {label: "Updeted Date", name: "updated", widget: "datetime", format: "YYYY-MM-DD HH:mm:ss", required: false}
      - {label: "Tags", name: "tags", widget: "list", required: false}
      - {label: "Thumbnail", name: "thumbnail", widget: "string", required: false}
      - {label: "Categories", name: "categories", widget: "list", required: false}
      - {label: "Body", name: "body", widget: "markdown", required: false}
      - {label: "Permalink", name: "permalink", widget: "string", required: false}
      - {label: "Comments", name: "comments", widget: "boolean", default: true, required: false}
label那里,如果你用的不是Suka主题的话,有些小地方需要根据实际情况进行修改,比如
- {label: "Thumbnail", name: "thumbnail", widget: "string", required: false}
在其他主题里面,如Hexo-Sakura,需要修改为下面这样才可以正常添加文章缩略图。
- {label: "Photos", name: "thumbnail", widget: "string", required: false}
其他的自己一边看文档一边摸索下吧
给主题引入netlify-identity-widget.js #
在主题的layout/index.ejs添加
<script src="https://identity.netlify.com/v1/netlify-identity-widget.js"></script>
这样在进入首页的时候就会加载netlify-identity-widget.js。
代码托管 #
建议用Github。原因无他,因为Github口碑最好,同时牌子最老。下面的操作以使用Github为例。
首先把博客文件托管到Github,最好是建一个私有仓库,这样可以保证配置文件的敏感信息(如API信息)不会被泄漏。
应该都会用Github吧,不会的话就查下文档吧。
注册netlify #
然后注册并登陆,Github账号登录即可。
之后进入这个页面,按照提示,授权访问、选择仓库。
选择仓库确认后,Bulid那里为了在构建的时候能安装依赖,需要改动一下,如果你跟我一样用Suka主题的话,那么就改为npm i && cd themes/suka/ && npm i && cd ../../ && hexo g,其他主题目录里面有package.json的同理,只需将上面那行命令的suka改为你主题的目录名即可。
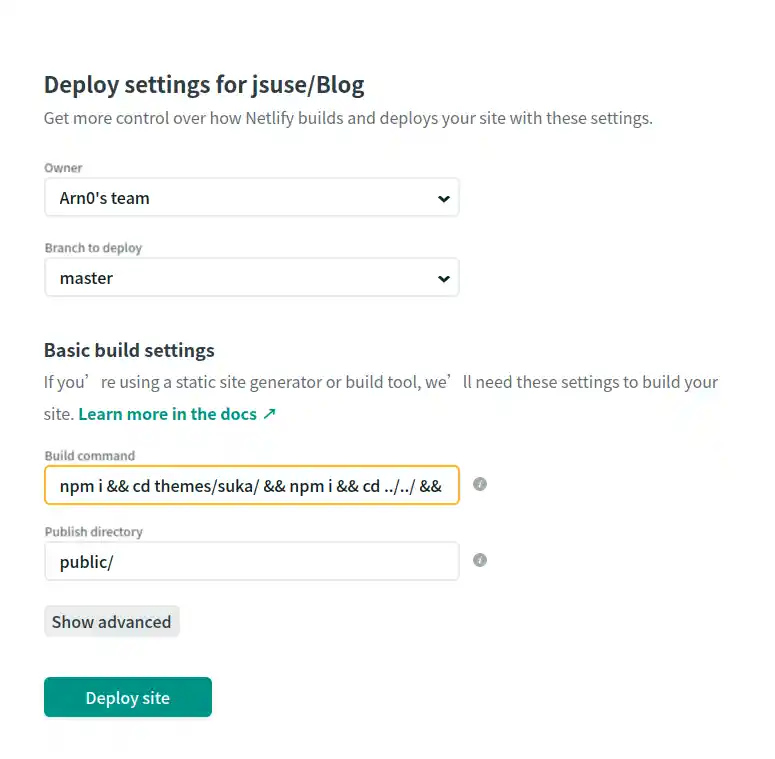
然后点击Deploy即可。
設置Gateway #
如图,点击Enable后按照提示授权即可。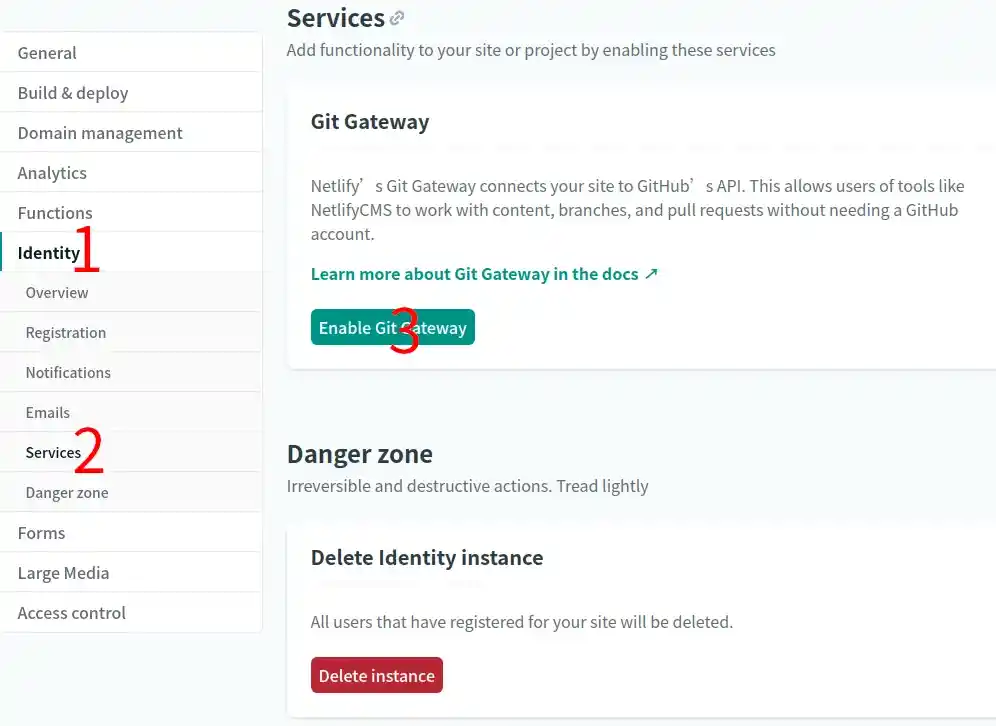
设置为仅邀请模式 #
为了不使你的文章被任意修改,设置为仅邀请模式。
在你的Oerview页面顶部导航那点击identity,点击Enable identity,然后点击Invite users。 写上你自己的邮箱并确认,过一会你的邮箱就会收到netlify的邮件,标题为"You’ve been invited to join(项目名称)",点击Accept the invite即可,这个邮箱接下来可以在admin页面那里用作登陆用的账户名。最多可以绑定的邮箱上限为 5 个。同时,也可以添加使用 github 账号登录的选项。
绑定域名 #
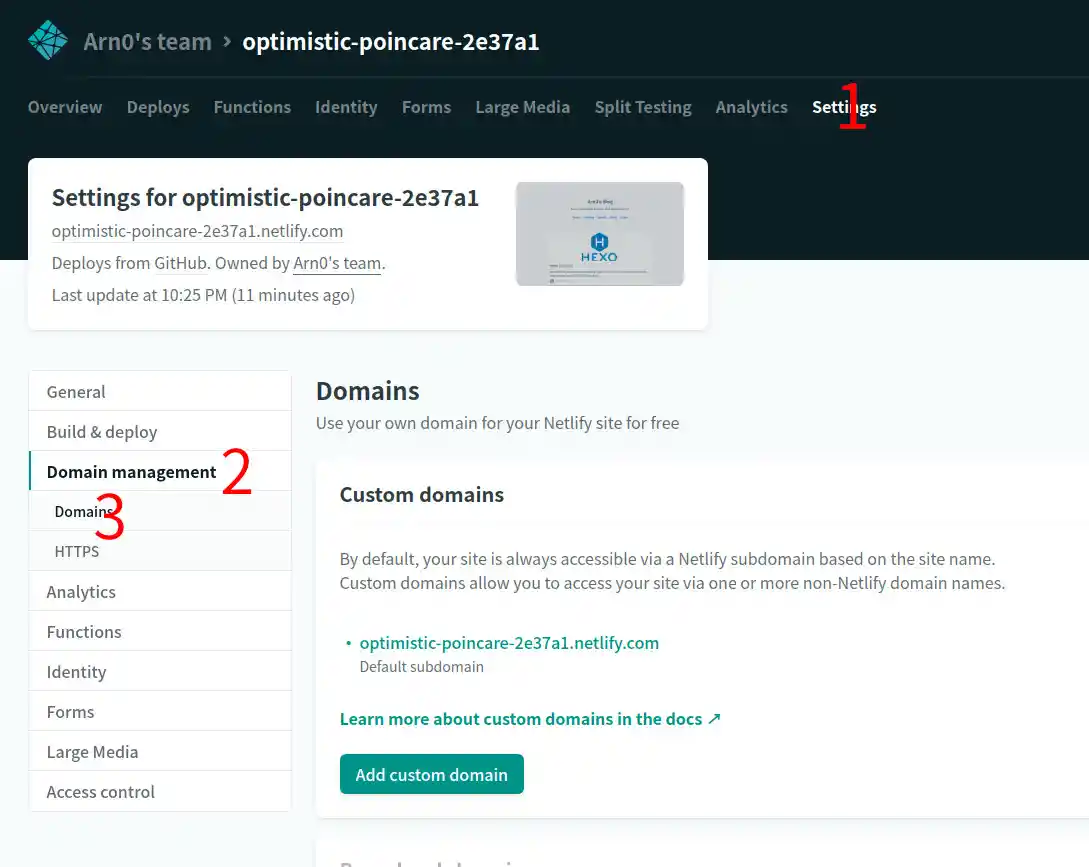
添加域名 #
按照图里的顺序,找到Add custom domain,点击并输入域名
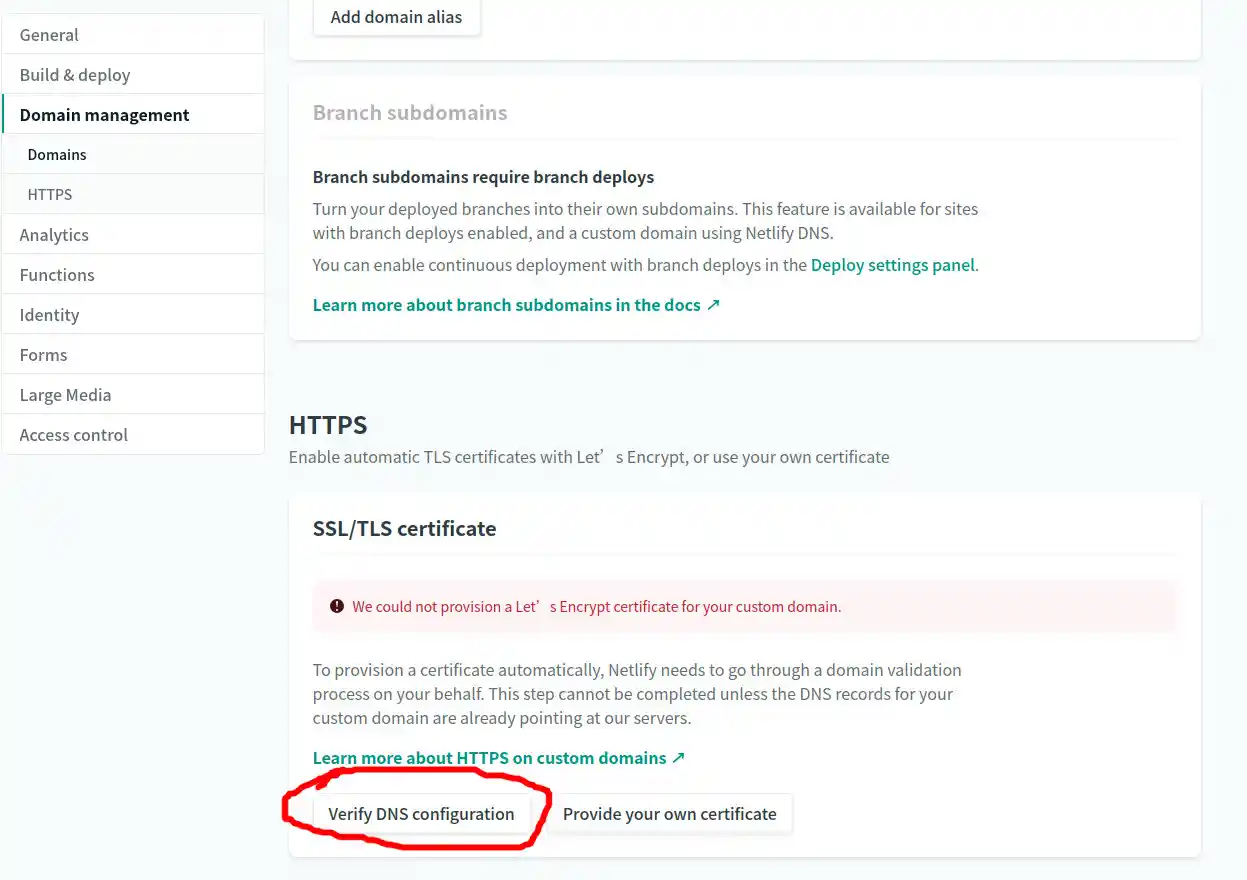
按照提示输入域名后,点击我画圈标记的地方,如图
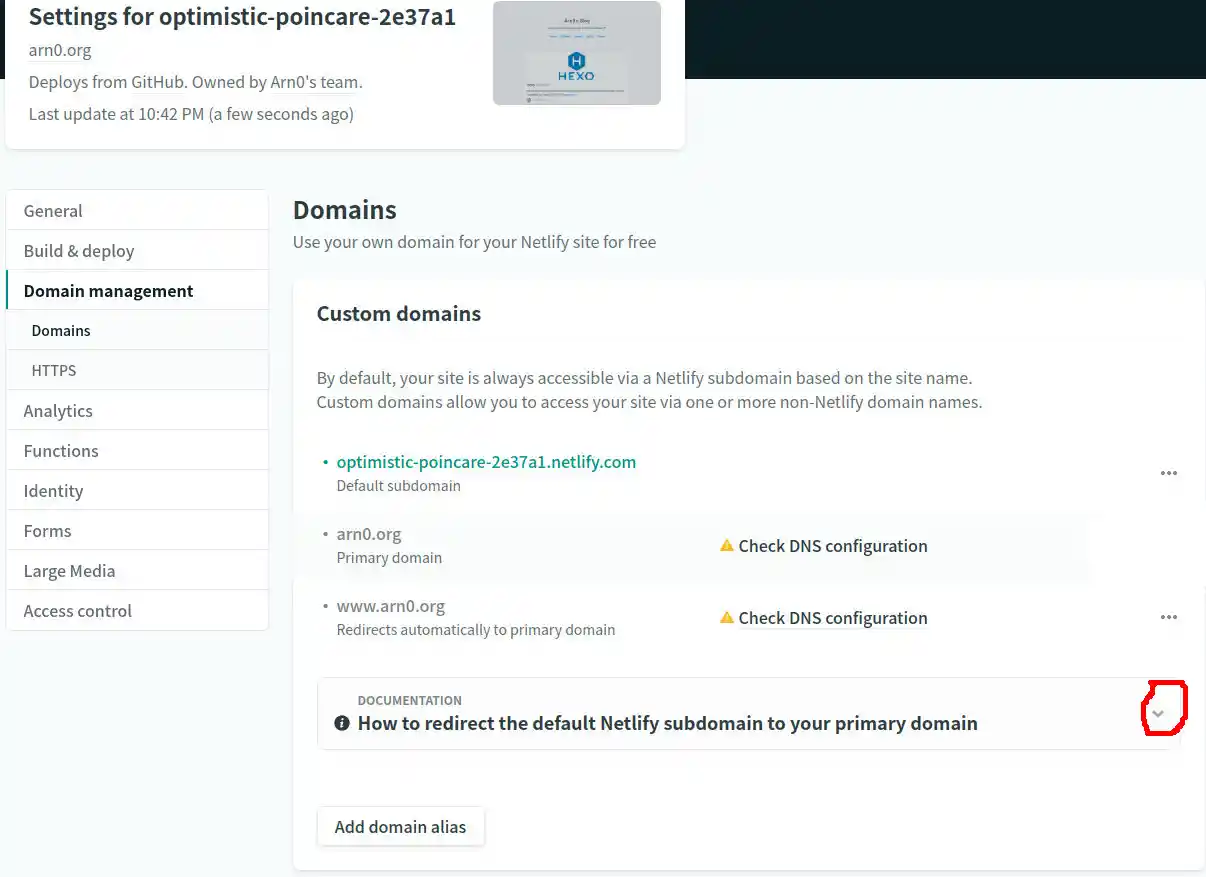
然后将弹出相关文档,指示要做一个301跳转。MD做301又要搞一个web服务器,很烦的好吗?(恼
这里其实不用做301,直接在DNS那里添加一条CNAME即可。
怎样添加?这里以CloudFlare为例,假设我域名是arn0.org,像要把域名绑定到blog.arn0.org这个二级域名的话,操作如图:
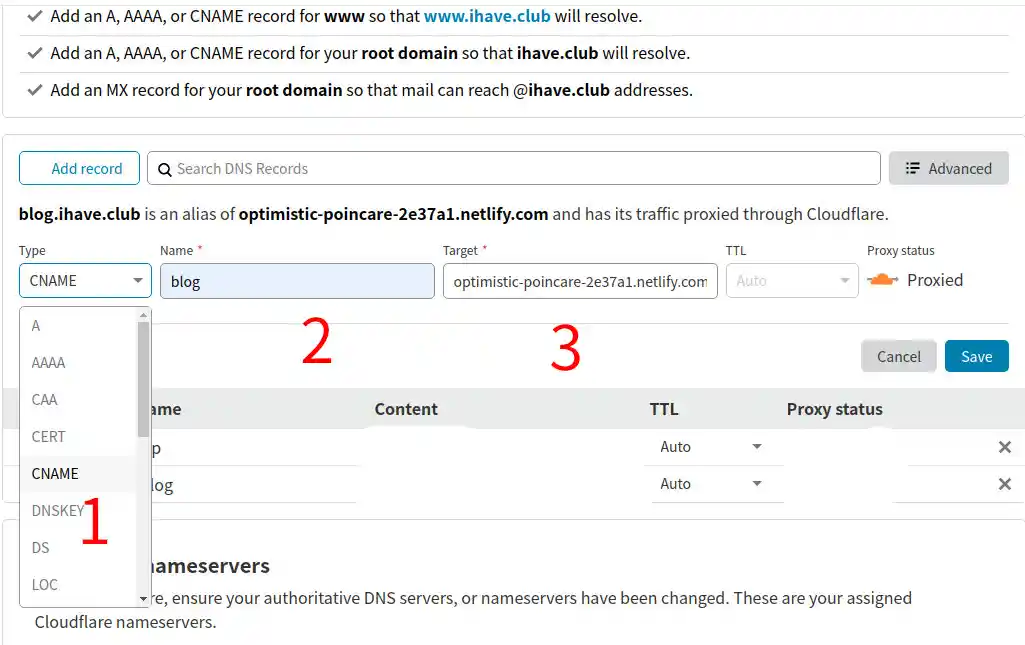
简而言之就是要在Type那选择CNAME,Name那里随便你填什么都行,这个决定你的域名的第一级名称,不要有特殊符号就行。
还有记得要把旁边的Proxy status橙色云点掉,让它变成灰色,不然等下申请不了SSL证书。
最后回到刚刚那个页面,点击Verify DNS configuration,等几分钟,让DNS缓存更新、SSL证书签发完成后。域名就绑定完成了。
完事了? #
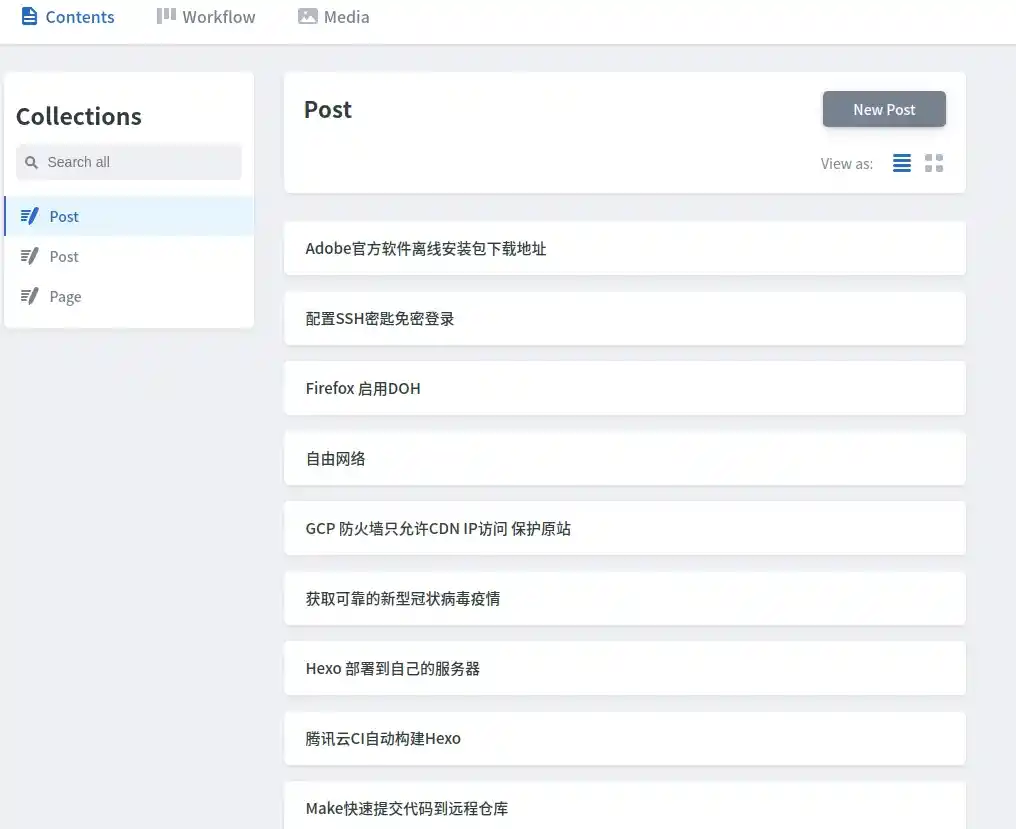
现在,你可以直接在你博客的主页链接后面添加/admin,输入用户名以及密码后就可以体验在线编辑了。
登陆后post页面空白 #
![]()
title: base64编码-解码字符串
author: Arn0

---
顶部那里居然少了一行---?所有文章都是同样的情况……
解决这种情况,只需要在文章顶部添加---即可,因为我是所有文章都要添加,不可能一个个手动修改,于是乎用上了sed:
sed -i '1i\---' source/_posts/*.md
完美,这下所有文章都改好了。
参考链接